Autumn Apple Bars

IMG_6877Autumn! Apples!  Time to start (or continue) baking! This recipe is actually an adaptation of one my nephew came home from pre-school with.  That is how easy it is!  It makes the house smell soooo good. And yes, I know, there is no applesauce in the recipe… but there are apples!  I used Macintosh because I like how they bake and the flavor they add.

Happy Baking!

Autumn Apple Bars

Ingredients:
½ stick vegan butter substitute (room temperature)
½ stick vegan shortening (room temperature)
½ cup sugar
½ cup brown sugar
1 egg
1 ¼ cup diced apples
¼ cup dried cherries or cranberries
1 cup flour
½ teaspoon baking powder
1 teaspoon cinnamon
¼ teaspoon nutmeg
½ teaspoon almond extract

  1. Preheat oven to 350 degrees.
  2. Cream the sugar and butter substitute and shortening.
  3. Add the egg and almond extract to the sugar and butter.
  4. Mix the flour, baking powder, cinnamon, and nutmeg in a separate bowl.  Gently toss the with the dried fruit.IMG_6896
  5. Add the dry ingredient mixture to the sugar and butter mixture, fold in the apples.
  6. Spread the batter in a greased 8×8 baking pan.
  7. Bake for 35-45 minutes, or until golden brown (and toothpick comes out clean from the middle).
  8. Allow to cool before cutting and serving.

Wacky Pumpkin Bundt Cake

Have you ever had a wacky cake? Wacky cake recipes originated during the depression, wacky cake recipes rely on vinegar and baking soda as the rising agents and are always egg free.  This is a new spin on a classic recipe, and I think it is a delicious cake worthy of any time of day- breakfast, snack or a traditional dessert.

Wacky Pumpkin Bundt Cake  IMG_6969

Cake Ingredients:
3 cups flour
2 cups sugar
1 Tablespoon cocoa
2 Tablespoons ground cinnamon
1 teaspoon ground nutmeg
½ teaspoon ground cloves
1 teaspoon salt
2 teaspoon baking soda
1 15oz can pumpkin puree
1 ½ cups water
½ cup canola oil
2 Tablespoons apple cider vinegar
2 teaspoons almond extract
Maple-Cinnamon Glaze
1 cup powdered sugar
¼ cup pure maple syrup
1 teaspoon canola oil
½ teaspoon ground cinnamon

  1. Preheat the oven to 350 degrees. Prepare your bundt pan by greasing and flouring it- set aside.
  2. In a large bowl, mix together flour, sugar, cocoa, cinnamon, nutmeg, cloves, salt, and baking soda.
  3. In a separate bowl whisk together the pumpkin, water, oil, vinegar and almond extract.
  4. Combine the wet ingredients with the dry, whisking until they are thoroughly mixed. Pour the batter into the bundt pan.
  5. Bake for 60 minutes, or until a toothpick comes out clean when inserted into the center.
  6. Allow cake to cool in pan for 5 minutes, then  turn upside down on a cooling rack and allow to cool completely. Once it has totally cooled you can transfer to a serving plate.
  7. Prepare the glaze by combining the glaze ingredients and mixing thoroughly, drizzle over cake.
  8. Serve and enjoy!

Chocolate Chip Coconut Bars

The season of baked goods is upon us!  Back to school, church gatherings, holidays, cool weather, the list goes on and on. Any excuse to do some baking, and I’m in.  Previously, I’d consider myself a traditional baker who uses traditional items with the occasional dairy free substitution.  Not this time! This is my  introductory venture into baking with applesauce.  Mission successful.  My conclusion: this is an experiment worth exploring. Side note- If you do not enjoy coconut- omit it!  I think you’ll find this recipe is just as tasty without it.

Chocolate Chip Coconut Bars
Ingredients:
2/3 cup vegetable oil
1 cup unsweetened applesauce
½ teaspoon vanilla extract
3 ½ cup flour
2 cups sugar
3 teaspoons baking powder
½ teaspoon salt
2 cup dairyfree chocolate chips
1 cup coconut shredded & unsweetened

  1. Preheat the oven to 350 degrees.
  2. Grease a 13×9 sheet pan with baking spray.
  3. In a large bowl, combine vegetable oil, applesauce and vanilla extract.
  4. In a separate medium bowl combine dry ingredients (flour, sugar, baking powder and salt).IMG_6008
  5. Gradually add the dry ingredients to the wet ingredient mixture, mixing well.
  6. Fold in the chocolate chips and coconut.
  7. Spread the batter into the bottom of the prepared baking pan with a spatula.
  8. Bake about 35-45 minutes, or until the top begins to brown lightly.  Cool completely before cutting into small squares.

Simple Vegan Chocolate Cake (Joy the Baker)

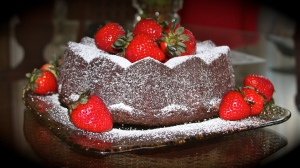
IMG_4396This is a big ‘ole YUM.  The recipe is perfect as is and required no substitutions or changes.  Joy the Baker knows how to bake (go figure, right?).  I brought this cake to a dinner party and it was a big hit.  It’s not unusual for us to go home with the leftovers of the dish we brought to contribute to the party.  Not this time.  The little bit of remaining cake got divided up among guests and went home with all who attended (full disclosure  it was a small party).  This  chocolate cake was easy to prepare, easy to bake and very easy to eat! It has the added bonus of being a truly simple recipe that did not require an extra trip to the store for special ingredients.  That is always a big win in my book.  Thanks to Joy the Baker for sharing this delicious Simple Vegan Chocolate Cake.  

To prepare, you’ll need to collect the following ingredients.  For instructions and additional inspiration, check out Joy the Baker’s blog.  There is no point in recreating the wheel on this one!  If it ain’t broke, don’t fix it! 🙂  

Happy Baking!

Vegan Chocolate Cake
Ingredients:
2 1/4 cups flour
1/2 cup cocoa powder
1 1/2 cups sugar
1 teaspoon baking soda
1/4 teaspoon baking powder
1/2 teaspoon salt
1 cup warm coffee
1/2 cup (plus 1 tablespoon) veggie oil
2 teaspoons vanilla extract
1/2 cup (or so) of chocolate chunks or chips (optional)

Instructions for baking this delicious creation HERE.


Refreshing Fruit Salad

Grapefruit

I have the food blahs this week, I’m totally uninspired and lack motivation to be creative in the kitchen.  What to do?  Make fruit salad!  It’s easy and cheerful.  No matter what time of year, I find that this recipe is very refreshing and delicious. I often make it in the summer as a grab and go or pot luck addition, it is also great to have on hand in the cold weather when you are looking for a healthy light side or snack- especially after (or during) the holiday season.  There are many variations of fruit salad, I happen to prefer mine without grapes and melon.  You’d be surprised as how delicious a sliced banana is when mixed with citrus- it maintains its independent flavor yet does not overpower the salad- I’d highly recommend it.

Refreshing Fruit Salad

Ingredients
1 Ruby Red Grapefruit
1 White Grapefruit
3 Naval Oranges
1 Granny Smith Apple (cored, peeling is optional)
1 Gala Apple (peeled & cored)
¼ cup orange juice

Optional:
2 kiwis (skinned)
1-2 bananas
8oz maraschino cherries, without stems (about half of a 16oz jar)

Timesaving kitchen tools:
Grapefruit knife
Grapefruit spoon
Citrus hand juicer
Chef’s Knife

  1.  To prepare the grapefruit, cut the grapefruit in half, use the grapefruit knife to go around the perimeter of the fruit between the sections and skin, then use a grapefruit spoon to individually scoop out each section of grapefruit. (I find that this method is a time saver in comparison to sectioning each section of grapefruit with the knife).  Use the juicer to extract any excess or remaining juice from the fruit.  Place the grapefruit sections and juice in a large bowl or pitcher of your choice.
  2. To prepare the oranges, repeat same steps as the grapefruit preparation.
  3. Cut the apples into bite size pieces, add to the bowl with the citrus, gently stirring immediately to prevent the apples from browning.
  4. Optional- add peeled, bite size pieces of kiwis or bananas.  For a kid friendly dish I recommend adding the cherries.
  5. Add the orange juice to taste- if the grapefruit flavor is too strong for your taste or if the fruit is not covered.
  6. Refrigerate and serve cold, excellent as a side, snack or dessert.

Buckeyes

This is a family favorite during the holidays as one of the dozens of variety of cookies that appear among the Christmas cookie platter. I prefer to make it at other times throughout the year, I find at Christmas there are just TOO MANY delicious cookies to choose from and in my opinion, to fully appreciate the yumminess of Buckeyes they should not compete with other baked goods.

When I make Buckeyes, I find myself extremely thankful for the electric stand mixer- I’d highly recommend using yours. Peanut butter is just such a thick, sticky product to work with. You’ll notice I also substituted some dairy free products for the traditional diary laden items. I find, no one misses the dairy!


Buckeyes

Ingredients

3 cups confectioners’ sugar
1 cup creamy peanut butter
4 tablespoons (1/2 stick) vegan butter substitute (room temperature)
1 teaspoon vanilla extract
3 cups semisweet chocolate chips (Your choice of dairy free)

  1. Prepare 2 baking sheets (that will fit in your freezer) by laying parchment paper on each sheet.
  2. Add the sugar, peanut butter, vegan butter substitute, and vanilla to the electric mixer bowl. Using the paddle attachment, beat the ingredients together. (A hand held mixer will also work in a pinch). Beat until the dough is crumbly. (See hint 1 below)
  3. Roll the doll into 1 inch balls, placing them on the parchment paper. Place the baking sheets in the freezer to chill for one hour.
  4. Using a double boiler (see hint 2 below), melt the chocolate chips in the by bringing the water to a boil. You will need to stir the chocolate frequently so it melts evenly. I DO NOT recommend using the microwave for this- it is too easy to ruin the temper of the chocolate.
  5. Once the chocolate has melted, use a toothpick to pierce the peanut butter ball, and carefully dip into the melted chocolate. Have a fork handy in case the tooth pick slips out. If the peanut butter balls keep slipping off of the toothpick you are probably dipping for too long- try to make it a quick process. Allow excess chocolate to drip off before returning to baking sheet. Repeat until you have dipped all the peanut butter balls.
  6. Allow the chocolate to harden, then carefully remove and place in a wax paper lined airtight container, refrigerate overnight before serving.

HINT 1: If the dough gets too hard to work with and is not sticking together, refrigerate it until chilled, this will make it easier to work with.

HINT 2: If you don’t have a double boiler (I do not), fret not. I use two pots that fit snugly together, allowing me to add water the larger one and fitting the smaller one inside of the larger one so it “floats” in a few inches of water.


Nantucket Cranberry “Pie”

Consider this a pie in disguise since the end result does not look like a traditional pie. This is a delicious holiday dessert- call it what you want- cake, pie- whatever. Either way it is still going to taste delicious.  And I owe credit and inspiration to The Pioneer Women, source of the recipe I used to create this yumminess. The difference- this version is dairy free. 

Happy baking!

Nantucket Cranberry “Pie”

Ingredients

Earth Balance Vegan Buttery stick (to grease the cake pan)

2 cups Fresh Cranberries

3/4 cup Pecans, chopped

2/3 cup Sugar

1 cup Flour

1 stick Earth Balance Vegan Buttery Stick (melted)

2 eggs

1 teaspoon Pure Almond Extract

1/4 teaspoon salt

1 tablespoon Sugar (for sprinkling)

5 Fresh Cranberries (chopped and mixed with sugar for sprinkling)

  1. Preheat the oven to 350 degrees.
  2. Grease a round cake pan.  Add the cranberries to the bottom of the pan, spreading them out evenly into a single layer. Spread the chopped pecans on top of the cranberries, then sprinkle 2/3 cup of sugar.
  3. In a separate medium bowl, mix together: flour, 1 cup sugar, melted vegan buttery stick, eggs, almond extract and salt.  Gently stir these ingredients together.
  4. Pour the batter slowly over the ingredients in the cake pan.  (You will notice if you do not work quickly the batter will begin to thicken, this is the vegan buttery spread as it recongeals).  Spread the batter gently to cover the surface, but be careful not to mix in or disturb the pecans and cranberry layer.
  5. Bake for 40 minutes.  Remove from oven, sprinkle chopped cranberries in center of pie and sprinkle entire pie with 1 tablespoon of sugar.  Return to oven and bake for additional 5-10 minutes, or until sugar begins to brown and cranberries juice.
  6. Serve and enjoy!

Again- my thanks to the amazing Pioneer Women for the original recipe adapted here.